Wednesday, July 11, 2012

Warming Hearts- One blanket at a time


As some of you know I do something every Christmas to give back. Earlier this year I started "Warming Hearts" and donated to a cancer treatment center. Well this year for Christmas I am creating blankets for an outpatient hospital here in Lakeland, FL for children with cancer. So if anyone would like to help out please let me know! You can help with squares, create blankets, or donated money to buy yarn. Everything Helps!

IF YOU WANT TO MAKE SQUARES. THE RULES: NORMAL GRANNY SQUARES. 12in x 12in
SOLID COLORS SQUARES (the square in one solid color!). In the Shades of RED, BLUE, GREEN, PURPLE, PINK, YELLOW, and ORANGE. 

Granny square example

This is how I am doing it. Each blanket will have a color theme. If it is RED then that blanket will be made up of different shades of red. The blankets will be about 36in x 48in. 

My plan is donate them in December. I am starting now so I am able to donate as much as I can. 
If you are wanting to help you will mail me your items and I can add put it all together. Thank you all!

I created a registry to raise money for "Warming Hearts". Please take the time to check it out and spread the word. http://warminghearts.mydagsite.com/

Please contact me: nlamort@hotmail.com 


I decided I am not doing all of them in granny squares but I am still sticking with the color themes. I got tired of doing granny squares after the first blanket :) You can still donate squares though and I will still put them together.

Saturday, July 7, 2012

Traveling Gnomes


 MEET STITCH and SHELLY!

If you want to be added to the list follow the rules on The Traveling Gnome. You must sign the Agreement forum then you must go to the Sign Up forum. Once you have done that I will add you to the Travel List. Unless you see a mistake on the travel list concerning your name do not post on that forum.

  • Your job is to contact the person before and after you. 
  • You will give the person before you YOUR address.
  • You will get the address from the person after you.
I will post the list below as well as on the the Travel List forum. If you subscribe to this blog you will receive notification of updates where as on Facebook you have to keep checking back and forth. So please subscribe here to make it easier to see the list.

Pictures will be posted on their Facebook page. Check it out!

Stitch’s Travel List

1. Nina LaMort - Florida
2. Jan Davies-Bell - Canada
3. Sarah Chidister- Indiana
4. Heather Dellinger- New Jersey
5. Melissa Wheeler- England
6. Amanda Murphy- New York
7. Genny Leuthard Hubert- Minnesota
8. Claudia Shuttleworth- Maryland
9. 
10. Darla Unavee- Ohio
11. Carolina MB- Canada
12. Maritza Delgado- New York
13. Heather Wallace- Scotland
14. Jo Chatterton- Canada
15. Sandy Trail-Branch- Missouri
16. Melanie Wiitanen Collins- Massachusetts
17. Mary Jean Wilhelm- Indiana
18. Melanie Fawcett- Pennsylvania
19.
20. Sandra Lucre- Australia
21.  Manda Lynn- Minnesota
22. Stacy Wilson- Pennsylvania
23. Bobbie Asche- North Carolina
24. 
25. Margaret Scarborough- Australia
26. Ashley Amber Artechi- California
27. Ruth Horton Cliett- California
28. Nicole Cook- New Mexico
29. Kathleen Basile- New York
30.
31. Karen Johnson- Indiana
32. Brandy Walton- Alabama
33. Donna Sokolowski Lovell- Tennessee
34. Leslie Isaac- Canada
35.
36. Carry Stutler- Kentucky
37.  Peg Stafford- California
38. Jacqueline Farrow- Australia
39. Joann Schirmacher Johnson-Grubbs- North Carolina
40. Amber Eaton- Arkansas
41. Mary Foster- New Hampshire
42. Paula Arthur Riggs- Pennsylvania
43. Amanda Freitas Grant- Massachusetts  
44. Kim 'Longmire' King- North Carolina
45. Qui Trice- Indiana
46. Lisa Peterson Norton- Georgia
47. Evie May- Ireland
48. Becky Kolb- Missouri
49. Gitana Santana- Puerto Rico
50. Sarah Chapman- Oregon
51. Lillie Rice- Kansas
52. Shannon DeSoto Brewster- Louisiana
53. Fressia Espinosa Marzal - Sweden
54. Dana Pogue Hess- California
55. Nina LaMort- Florida

Stitch's WAITING LIST

1. Beth Sines- Ohio
2. Carmel Feaser-Washington
3. Laura Booth- England
4. Bobby Pam Bryant- California
5. Liz French- Virgina
6. Tiffany Jenkins-Dennis – Maryland
7. Teri Lemnah Johnston Tucker- North Carolina
9. Kady Herron- Texas
10. Sarah Symons Woodley- Oregon
11. Helen Young- California
12. Mary-Joe Firefly- Michigan
13. Kathy Lee Oldfield- Georgia
14. Larissa Bell- Texas
 
SHELLY’s LIST

  1. Nina LaMort- Florida
  2. Dana Hess- California
  3. Bobby Pam Bryant- California
  4. Carmel Feaser-Washington
  5. Beth Sines- Ohio
  6. Laura Booth- England
  7. Gitana Santana- Puerto Rico (She will be in FL though)
  8. Qui Trice- Indiana
  9. Sarah Chapman- Oregon
  10. Sarah Symons Woodley- Oregon
  11. Lisa Peterson Norton- Georgia
  12. Kathy Lee Oldfield- Georgia
  13.  Becky Kolb- Missouri
  14. Lillie Rice- Kansas
  15. Shannon DeSota Brewster- Louisiana 
  16. Kady Herron- Texas
  17. Amber Eaton- Arkansas
  18. Paula Arthur Riggs- Pennsylvania
  19. Kim 'Longmire' King- North Carolina
  20. Joann Schirmacher Johnson-Grubbs- North Carolina
  21. . Jacqueline Farrow- Australia
  22. Margaret Scarborough- Australia

  23. Sandra Lucre- Australia
  24. . Karen Johnson- Indiana
  25. Carry Stutler- Kentucky
  26. . Nicole Cook- New Mexico
  27. Ruth Horton Cliett- California
  28. . Ashley Amber Artechi- California
  29. . Stacy Wilson- Pennsylvania
  30. Melanie Fawcett- Pennsylvania
  31. Marjorie Taylor- Pennsylvania
  32.  Manda Lynn- Minnesota

  33. Sandy Trail-Branch- Missouri
  34.  Maritza Delgado- New York
  35. Amanda Murphy- New York
  36. Heather Wallace- Scotland
  37. Carolina MB- Canada
  38. Claudia Shuttleworth- Maryland
  39. Sarah Chidister- Indiana

Friday, June 22, 2012

Food coloring isn't just for food. DYE YARN!


 HEY! Told you I would write up another blog about how to dye yarn. A few blogs ago I showed one way with Kool-Aid, but I am always looking for new ways and I came across this concept. I am such a visual person so that is why I love making blogs like this. WITH PICTURES

So here is what you'll need: White vinegar, bowls for each color, something to warm water in, food coloring, spoon, yarn (WOOL BLEND), book, and gloves are a good idea! I dyed my hands...several times.


Lets get this shindig started.

Grab a book and your yarn. (This is my favorite book, READ IT )


I always put the tail at one end.
Start wrapping it around and around and around. You can do this with the entire skein or how every much you want to dye. I usually do half  and that usually makes a baby beanie with some left over.

Now cut the yarn (if you didn't use the entire skein) Cut 2 pieces of yarn that is about 6 inches long. I like to use the same yarn that I am  about to dye.

Slide one of the pieces of yarn between the book and yarn and tie it. This will prevent it from getting all tangled in the end.


Do the previous step on the back of the book as well.


No it is time to prep for your dye. It really depends on what color you are wanting to make. The more water you use the lighter the color you will get. I usually use about 3/4 cup for each bowl. After filling my cup I stick it in the microwave for 1 minute.


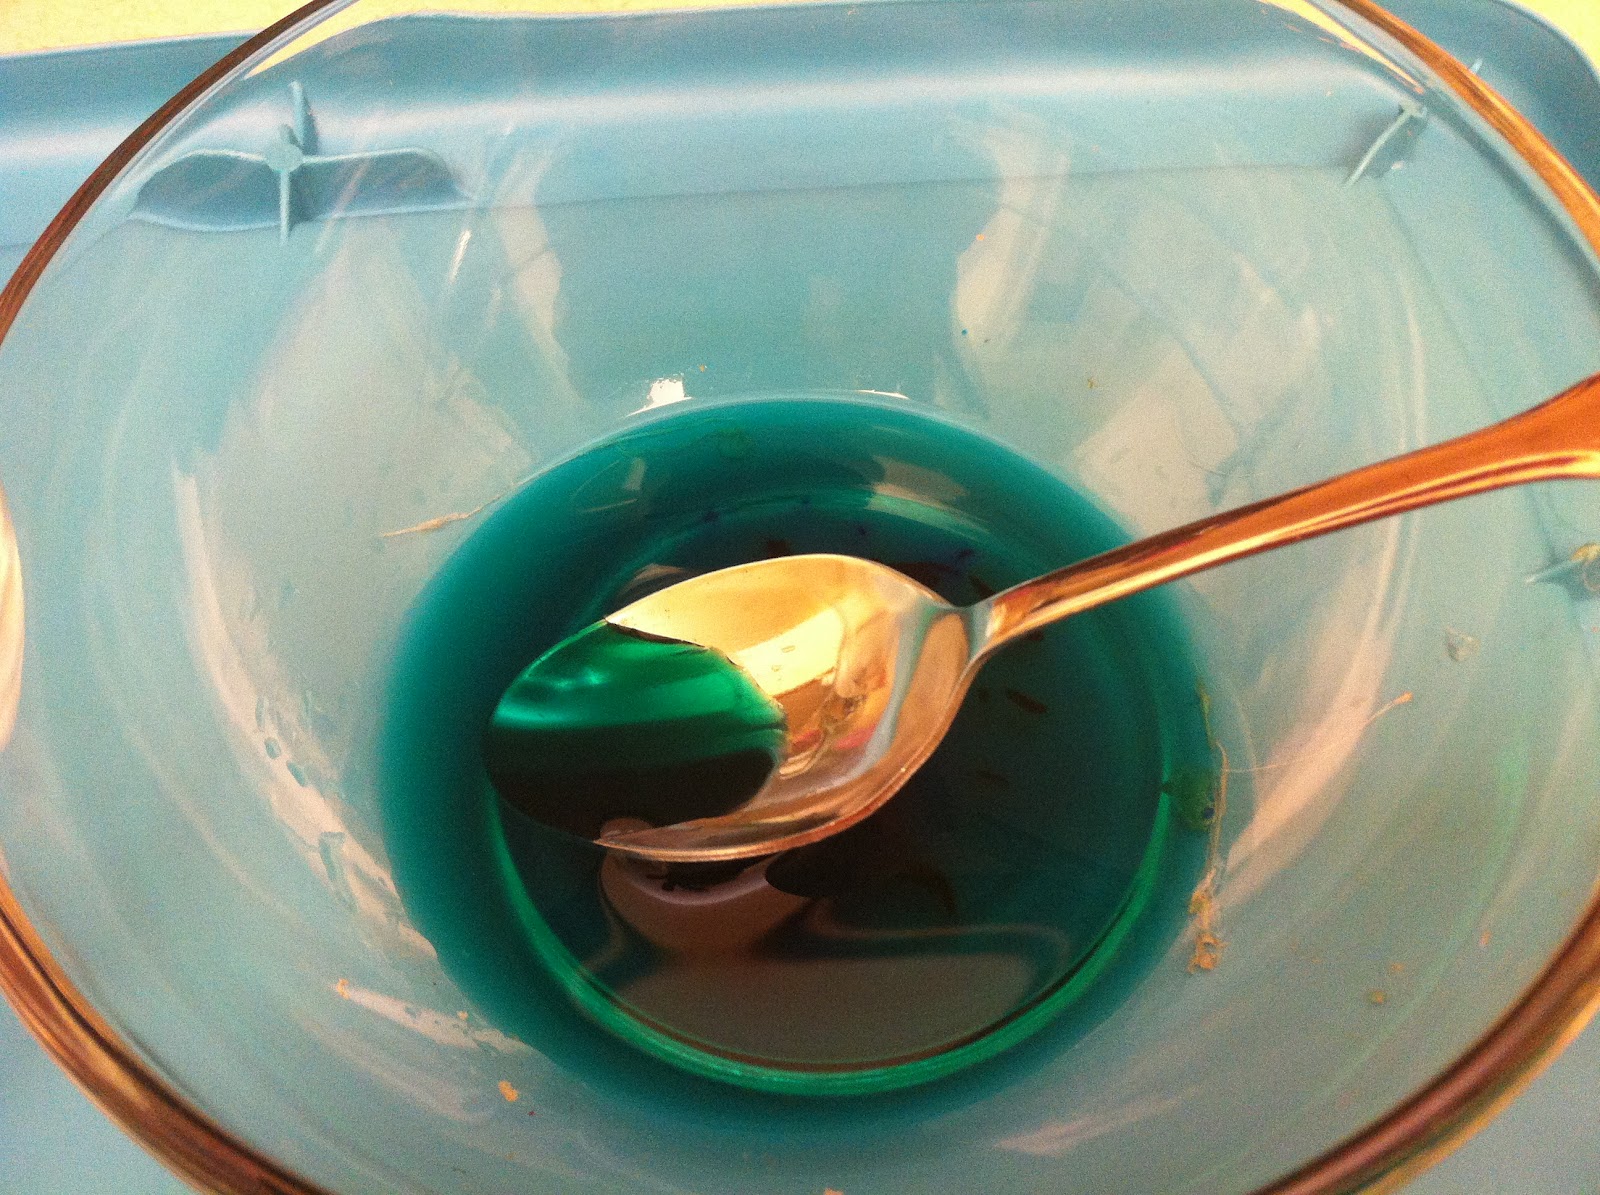
While my water is heating up I pour about 3/4 cup of vinegar into each of the bowls that I am using. Then I add my dye and mix it with the vinegar.

 Once the water has been heated up, pour it into each bowl and mix it with the vinegar/food coloring.

Here's the messy part. If you noticed I stuck a rectangle plastic lid underneath the bowls. Its an easy clean up and keeps the dye off of the counters! Put part of the yarn into the dye. I use a spoon to help push it down in the dye. The longer you let it sit in the dye the darker it will get.

Once you get the color you want gently squeeze the yarn back into the bowl that you just used. This is where the gloves come in handy! TRUST ME. My hands are bluish as I type this :) I didn't have gloves

Now put the yarn into your other color. Use the spoon again if you need to.
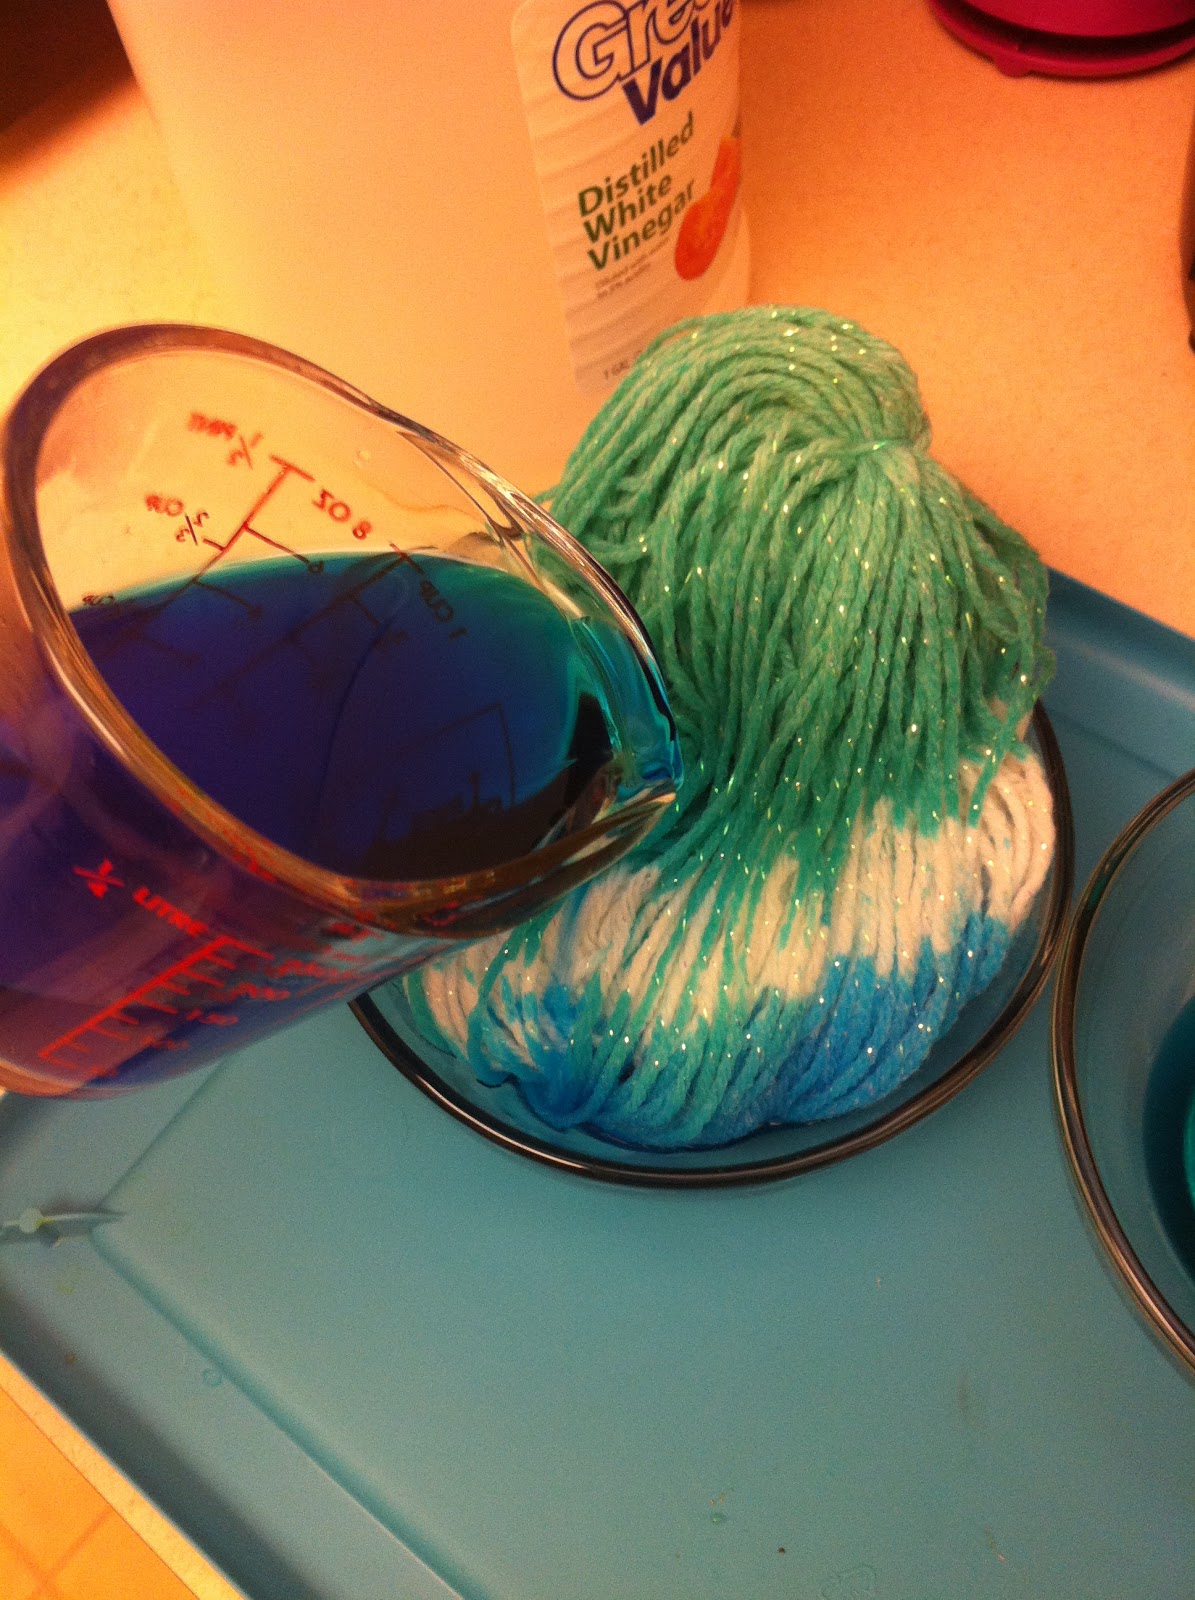
TIP: I realized I didn't make enough of my blue color. So I heated up some more water and just did my mixing in the cup I heated it up in.

Then I poured it right onto the yarn.

TIP: Gently spread parts of the yarn apart to make sure the insides are all getting dyed.

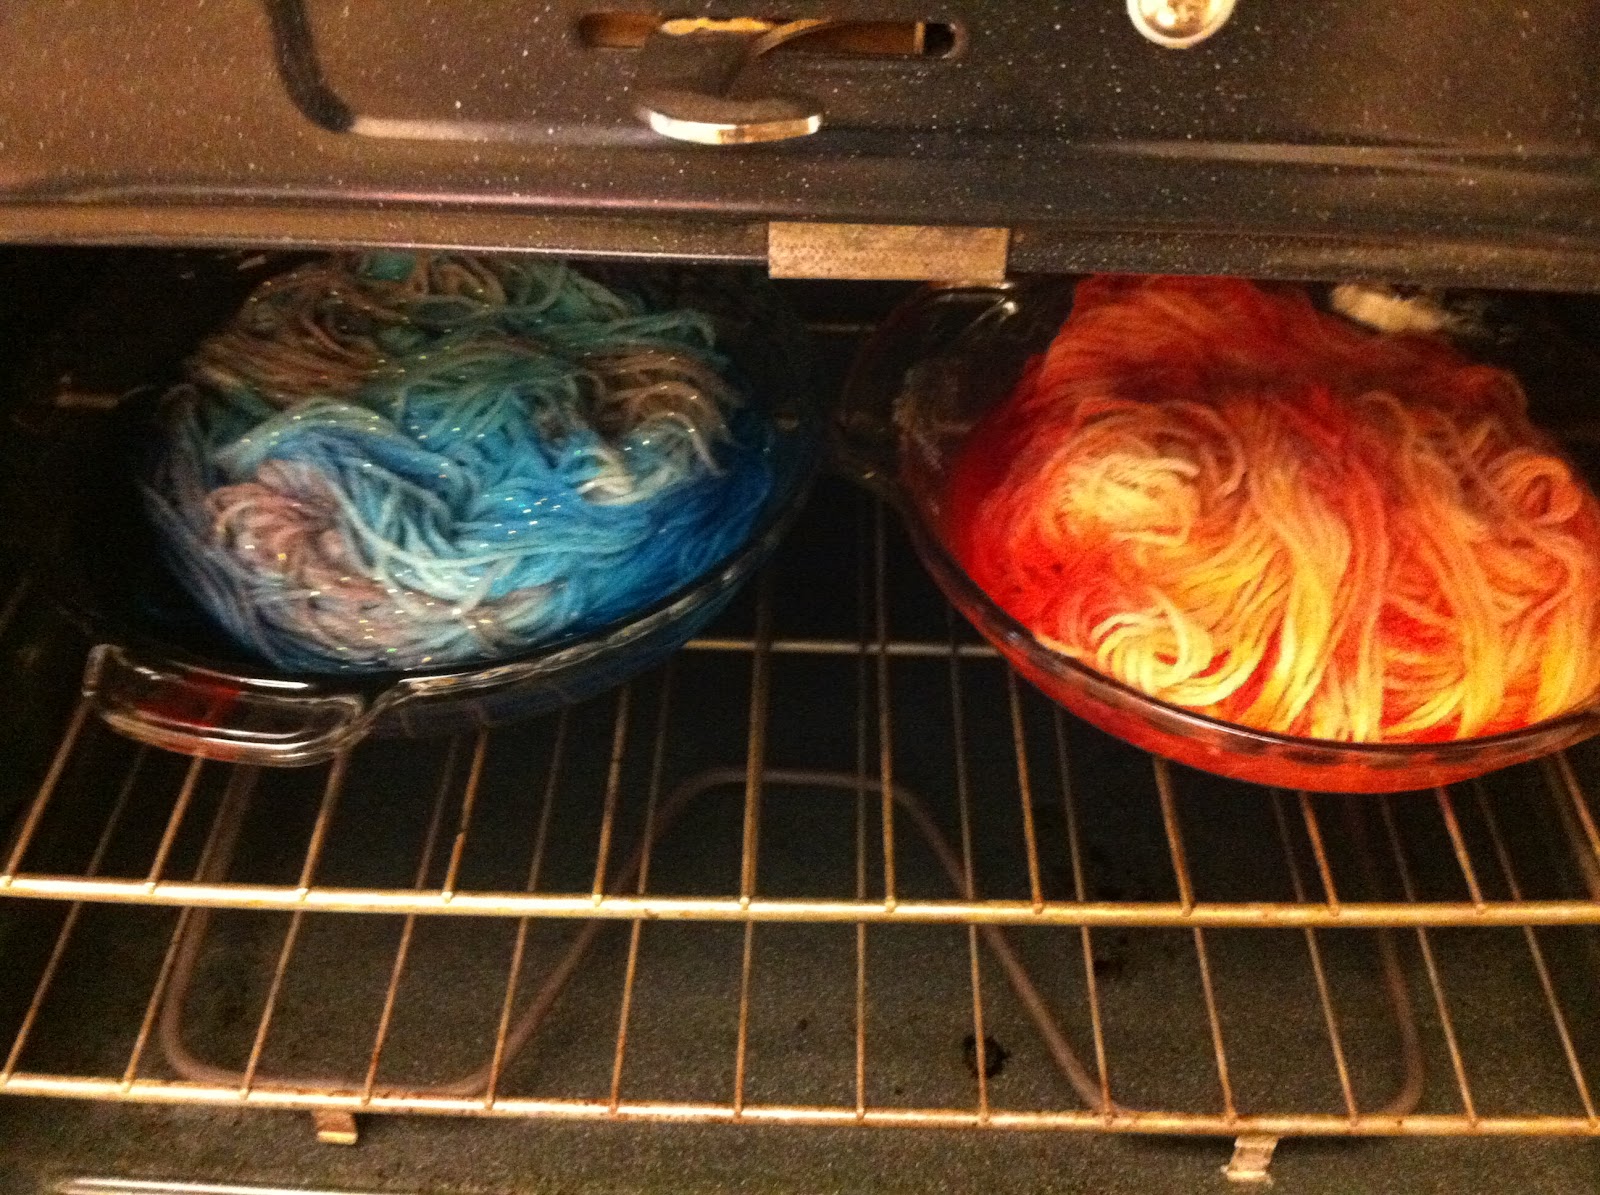
Now your yarn is done! Well basically. I knew I was done using my first bowl so I dumped the dye out and rinsed it. I put my dye yarn into the bowl. HEY IT'S LESS TO CLEAN! Now it is time to bake it. This will help set the color. I microwave the yarn for 2 minutes on high.
 It is going to be SUPER hot so be careful! Your next step is to rinse under cool water. If you do not see any dye running out, then you're good to go. If you do, then you need to microwave it longer

I like to put mine in the dryer so it will dry quickly, but that is totally up to you.
See how it stayed untangled! Cut off the 2 strands that you tied around it.

Fine the end. Ignore that needle I have no idea why that is in there.

I like to wrap mine around my fingers.

and turn it into a ball.

I hope all of this is very helpful for you all. I can't wait to see what you come up with.

Check me out on Facebook: Granny in Style

Monday, June 4, 2012

NO, that is not SPAGHETTI! It's custom yarn dye!

Im not going to lie, dyeing yarn is pretty darn fun! I love seeing the outcome! I wanted to share this craft with you. I hope you will enjoy it as much as I have and will continue to do. I WANT TO SEE PICTURES when you do it :) Post on my FB page https://www.facebook.com/pages/Granny-In-Style/195714050446750

What you'll need
  • Oven 250 degrees
  • WOOL
  • Kool-aid (1 pack of kool-aid will fill 4 ice trays) I used about 4 packs per skein.
  • Vinegar
  • Ice trays
  • Gloves ( I didn't have them and my hands got dye all over them)
  • Cooking pot (big enough to fit the skein)
  • Water
  • Casserole pan
SO here it goes. Pre heat oven 250 degrees
First you must have WOOL yarn. That is VERY VERY important. Put the yarn in the pot. Fill the pot with water, enough to cover the majority of the yarn. I covered about 3/4 of the yarn. Dump in a few cups of vinegar. I didn't measure, sorry. Turn the stove on medium high and sit the pot on there. Let the yarn "cook" for 30 minutes - hour. Rotate  the yarn if you need to to make sure all of it soaks up the mixture. Hope that all makes sense!

While that is cooking, I get the dye prepped. My ice tray has 16 ice cube slots. So thats how much dye I create. 1 packet will fill 4 ice trays. Here's the trick. I got my ice tray and filled 4 slots with water. I then dumped that water into a cup, so I can tell how much water is needed. I am a visual person so that is how I measured the rest of my dyes. Now that the water is in the cup put 1 pack of koolaid into the cup of water. Mix it. Dump that into 4 ice tray slots. Now fill up that same cup with approximately the same amount of water. (you dont have to be perfect) Dump in another pack of koolaid and put it into 4 more slots. Continue to do this with all of your colors. Put in freeze to freeze.

Next take the yarn out of the pot. I used a pair of tongs to do so. If you need to let it cool for a little bit. Once it is cool enough for you to handle, gently wring out some of the liquid. You do not have to wring it completely out so dont worry. Now gently loosen up the yarn and place it in the casserole pan.

When the dye is completely frozen place it onto your yarn. Any way you want to.


Now place in the oven. I cooked it for an hour. You can check on it. You want it to run clear water. You will be able to see that in the bottom of the pan.


After it is cooked carefully take the pan out. Run it under cool water. Make sure no dye is running out of it. If so then it needs to cook longer.

Now the boring part. Let the yarn dry. You can sit it outside to naturally dry or even throw it in the dryer on a very delicate cycle.

ENJOY!
This is one ball of yarn. Used 4 different colors.
That one ball of yarn, created this stylish hat

Red and Orange


Different shades of pink and red

Blue and purple with glitter wool


Sunday, December 18, 2011

Venison!

YES it is true! I eat venison. I love it! Most people I have talked to do not enjoy it. I personally think it is the way it was probably cooked that made them not like it. We eat it for everything! Everything you cook beef with, we use venison. I think I'll post venison recipes to help out those needing good ideas. Speaking of deer, Craig got a doe yesterday morning :) We seriously do not have to by any beef for an entire year. Actually we are still finishing up the venison we got last years!
So today's recipe is for venison steak fingers. SORRY I don't really measure anything out when I cook, but hopefully I can give enough information to help you figure it out.

Roll Call:
Venison tenderized Eye of Round Steak
Flour
Italian Seasoning
Season Salt
Bread Crumbs
2 eggs (I knew the amount for that haha)
Oil
Half and Half
So it might sound a little crazy using half and half but that was all that I had in the fridge and it worked AMAZING! I put the steaks in a bowl and cover them completely with half and half and stuck it in the fridge for about an hour. It took ALL of the gamey taste out. COMPLETELY. 

Once they are done marinating I got a 1 gallon zip lock bag. I filled it up with roughly 2-3 cups of flour, 1/2 cup of bread crumbs, added Italian seasoning and season salt. I used a spoon and mixed it around in the flour. With venison you want to add a little more seasoning compared to what you would do for beef or chicken. I look at the flour and determine if I think I have added enough. You want to be able to see the seasoning in the flour.

Heat the oil about 1inch high in the pan on medium/high. So on a 1-10 stove do about a 7/8.
    
I like the reflection :)
In a bowl put 2 eggs in it and stir it around.

Now here comes the dirty and messy part. I like to use shears but you can use a knife, cut the steak into strips or chunks. Make sure they are about the same size so they will cook properly. After cutting them up drop them into the zip lock bag of flour.
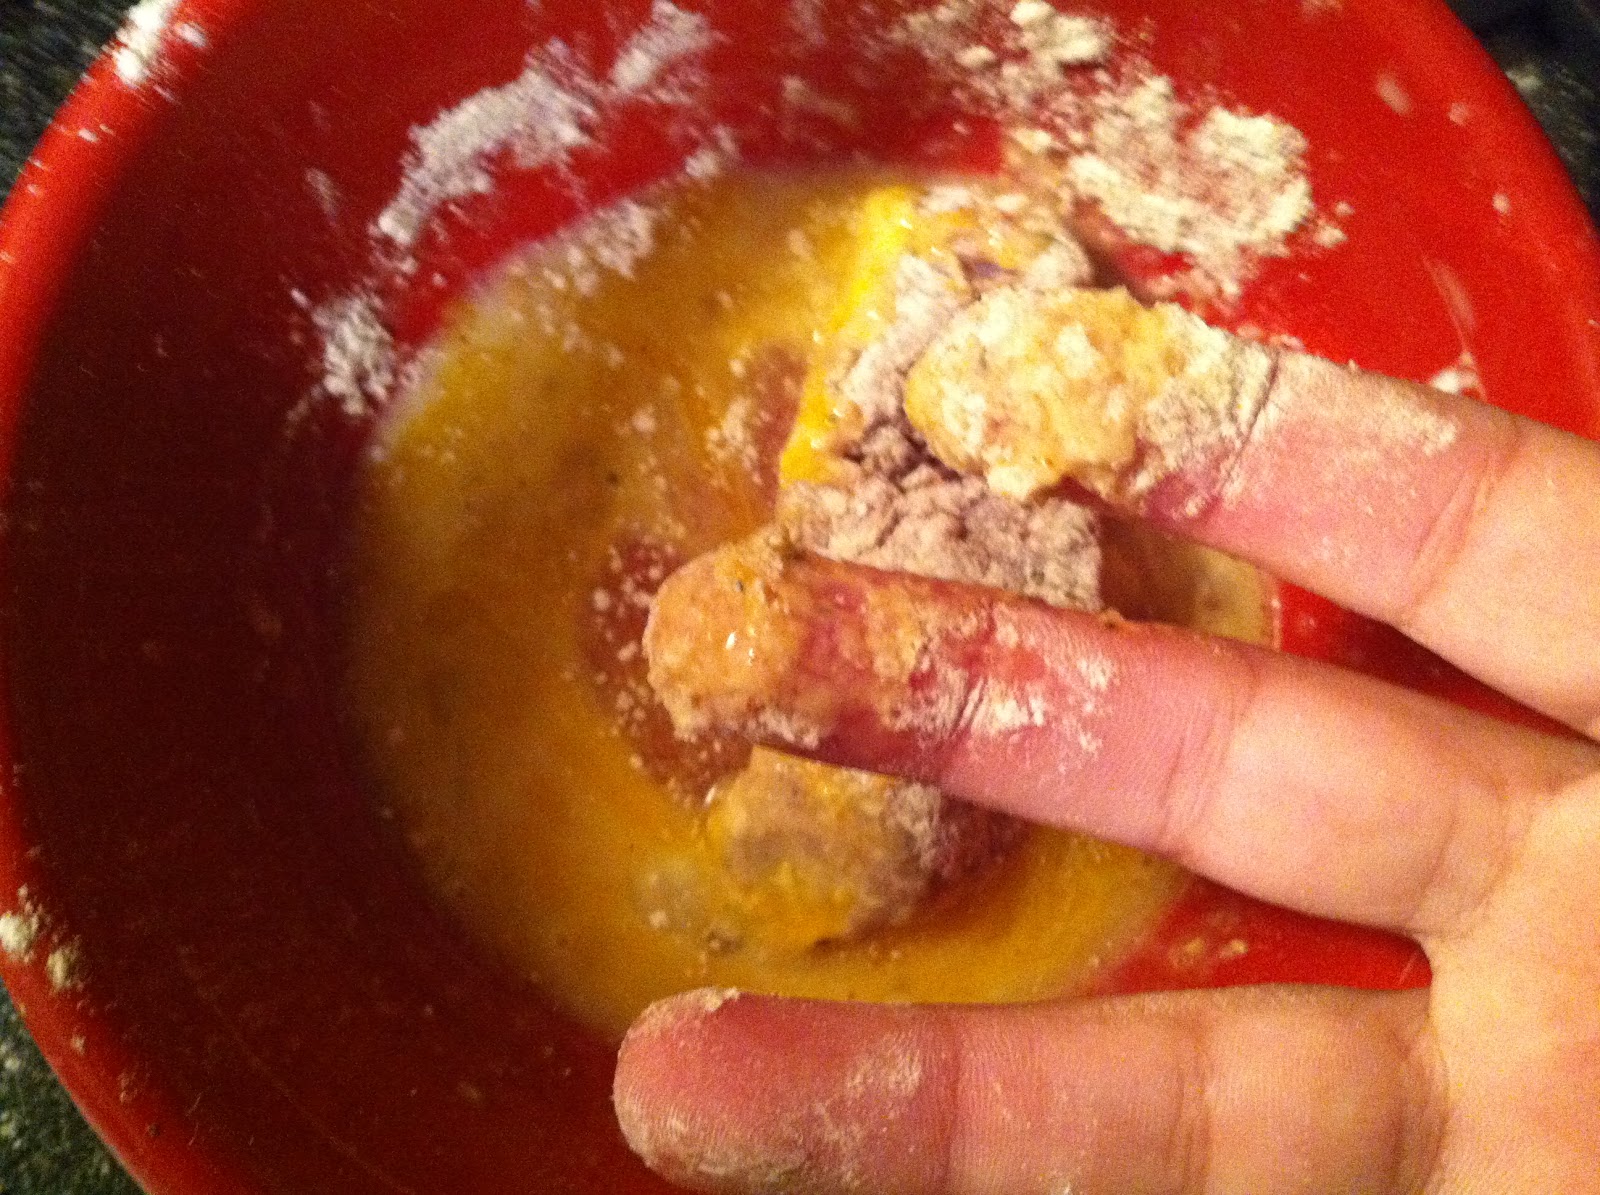
Zip lock the bag shut. NOW make sure its shut again. :) SHAKE IT. (the bag, not your booty. well I guess you can do both if you want to.) Open the back and see if the steaks have a good coating of flour on them. What I like to do is while the steak is still in the bag put them to one corner. Take out 1 piece out and dunk it in the egg bowl. Then put that piece back in the back but the opposite corner. Continue to do that until all steaks have been put into the eggs and back into the flour.
It gets messy!!


Close the zip lock bag again. Shake it! Open the bag and place the steaks in the hot oil. BE CAREFUL! Cook them on one side for a few minutes. You will be able to see the bottoms turning a golden brown.
While that was cooking I made a really easy and great tasting sauce to dip the steaks in. All it is, is brown sugar and mustard mixed together. Do equal parts. It tastes like honey mustard.

Flip the steaks and cook on the other side for another few minutes.

NOW ITS TIME TO EAT!!
Hope that was easy enough to understand. ENJOY!!

Sunday, December 11, 2011

Baked Spaghetti-

I get tired of just plain spaghetti. It's just boooooring. This one is creamy, saucey, meaty, and scrumptious. 


12 oz spaghetti
1 (28 ounce) jars prepared spaghetti sauce
1 lb lean ground beef
1 tsp Italian seasoning
1 clove garlic, minced
8 ounces cream cheese
1/2 cup parmesan cheese, grated

Preheat oven to 350 F degrees.

In a skillet, brown the ground beef until cooked through; drain fat and stir in spaghetti sauce.  Set aside.


Cook spaghetti according to directions on packet.  Drain and place cooked spaghetti in bowl.  Add cream cheese, Italian Seasoning and minced garlic (I used garlic salt instead).  Stir until cream cheese is melted and the spaghetti is thoroughly coated.


Lightly grease a 9x13" pan.  Spread a small amount of meat sauce in the bottom of the dish.  Put spaghetti on top of sauce and top with remaining meat sauce.  Sprinkle parmesan cheese on top.

Layer 1
Layer 2

Layer 3- Now sprinkle the cheese on! (Cheese makes everything wonderful)


 Bake for 30 minutes, until bubbly.

LETS EAT!

You can cut the spaghetti out into a neat square or just dig in like I did. Hey it's spaghetti! Its suppose to be messy.


Friday, December 2, 2011

Bring It on WORLD

MAN oh MAN! It sure has been a hectic week. School, meetings, and not sleeping very well makes for a very long, draining week. The semester is almost over though. Just 2 more weeks.  Then I'll be student teaching!

I have 2 projects going on right now. The first one is Beanies for Babies. Each year around Christmas time I try to do something to give back. This year I have created beanies for newborn babies at our local hospital. People were able to donate money, yarn, and/or beanies they have created. Guess how many I have, just dooooo it. 95!!! My mom has created about 20 some and the rest has been yarn/money donations. I have just a few more weeks to create some more before I deliver them. The babies have to be stylish when they come into the world. Thats what I think anyways. Heres the link to the beanies (if you wanted to check them out) https://www.facebook.com/media/set/?set=a.253595577991930.67493.195714050446750&type=3

My other event is Around the World with Love. HOLY SMOKES. That pretty much sums that up. Never thought I would get the response that I have. It makes me so excited that all these people are willing to help. THANK YOU ALL A TON! The link for that is at the top of this page if you're interested to find out more information. I will also be posting updates on my Facebook page https://www.facebook.com/pages/Granny-In-Style/195714050446750 I can not express how ecstatic this makes me! For one I love to travel and to teach. So why not put them together. HEELLLLLLO. I started just a few days ago and I have almost reach me goal! WOOHOO.

Lastly I have had a few people ask me about how I came up with my name "Granny in Style" Well I am very far from becoming a granny.....age wise. I am a 25 year old and 0 kids...so that just doesn't add up. HAHA. Well I have been crocheting (trying to) for a long time. My mom taught me when I was a youngster, but all I ever did was the single stitch. I started crochet again this summer. At the time I had a ton of classes to take in a very short amount of time. So I was stressed out and needed 'me' time. Not many people my age crochet and I got a lot of slack for doing it (they were always jokingly doing it). I was being called a granny. AND BAM thats how I got the name. I just went along. If you can't beat them...JOIN THEM.

Saw this while riding on the motorcycle in TX. 
I hope everyone has a great weekend! Get crafty, be creative, and RELAX.